Fruity Pebbles Rice Krispie Treats Recipe
Introduction
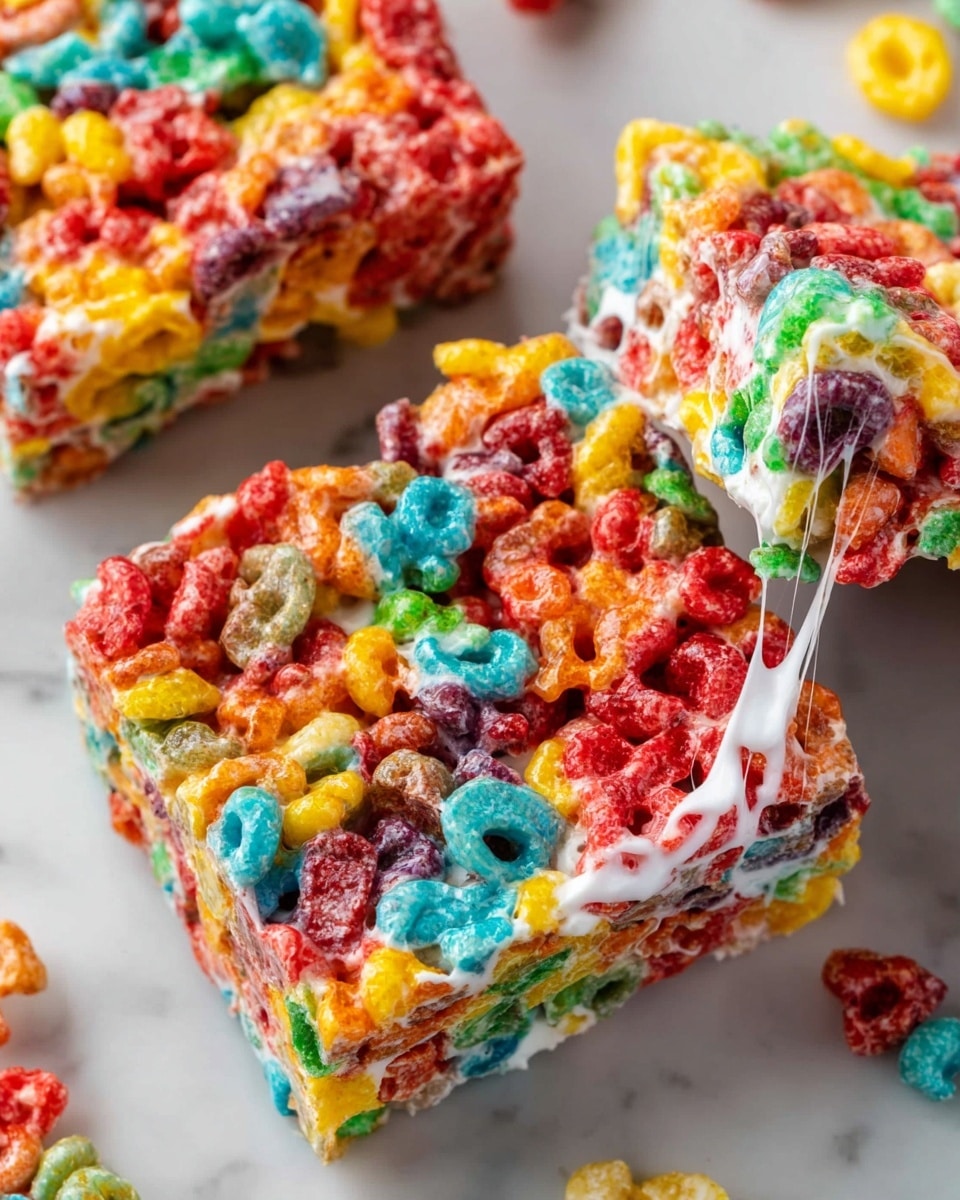
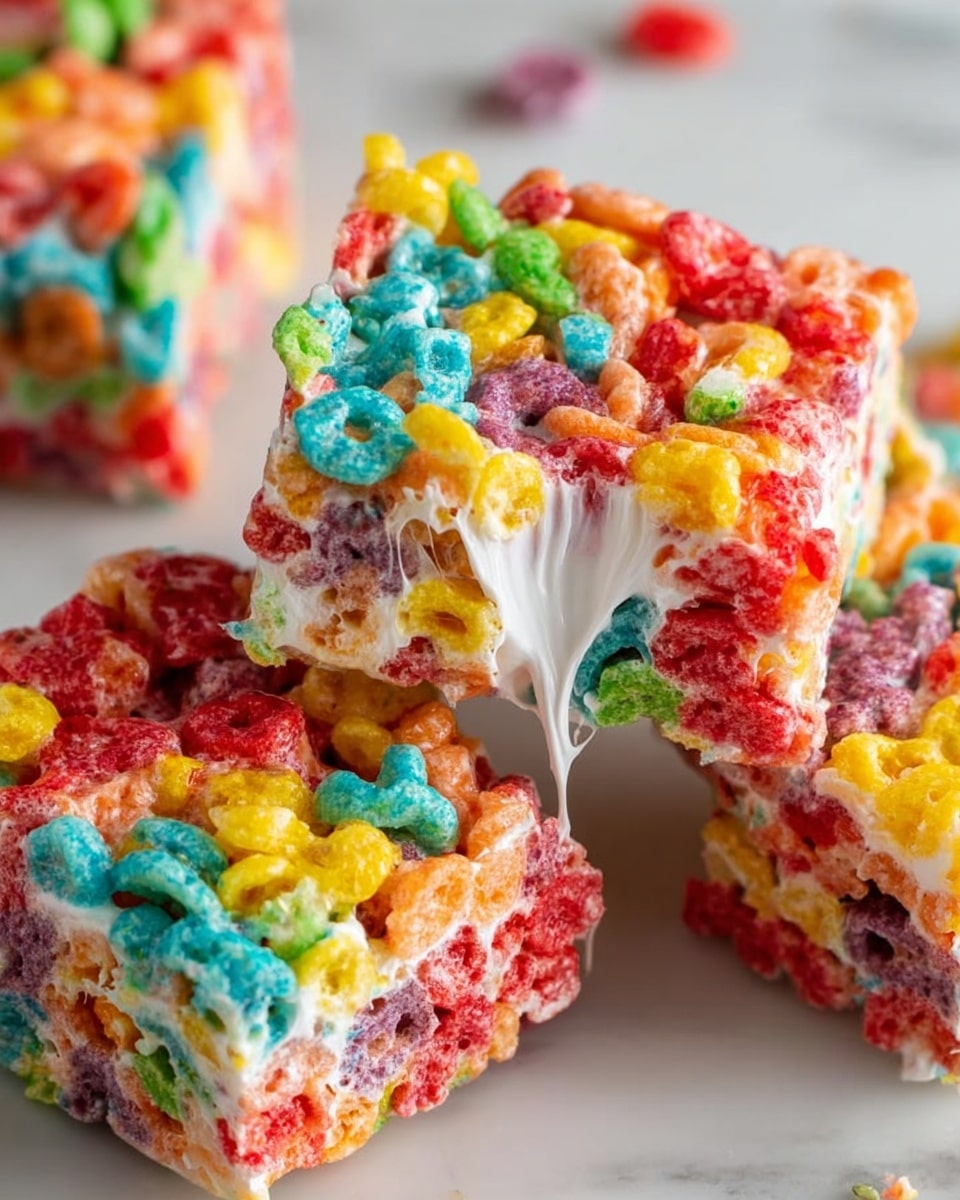
Fruity Pebbles Rice Krispie Treats offer a colorful and flavorful twist on the classic marshmallow cereal treat. These chewy, sweet bars are easy to make and perfect for a fun dessert or snack that both kids and adults will love.
Ingredients
- 5 cups Fruity Pebble cereal
- 1/4 cup salted butter
- 4 cups mini marshmallows
Instructions
- Step 1: Pour 5 cups of Fruity Pebble cereal into a large mixing bowl and set aside. Lightly grease an 8×8-inch pan with nonstick spray or butter.
- Step 2: In a medium saucepan over low heat, melt 1/4 cup of salted butter. Once melted, add 4 cups of mini marshmallows and stir constantly until fully melted and smooth, about 3 to 5 minutes.
- Step 3: Immediately pour the melted marshmallow mixture over the cereal. Stir with a rubber spatula until the cereal is evenly coated.
- Step 4: Transfer the mixture to the prepared 8×8-inch pan. Using a piece of wax or parchment paper, press the mixture evenly into the pan, pressing gently to keep the treats light and chewy.
- Step 5: Allow the treats to cool completely at room temperature for about 20 to 30 minutes. For quicker cooling, place the pan in the refrigerator for about 5 minutes.
- Step 6: Once cooled, cut into 9 squares and serve.
Tips & Variations
- For an extra fun twist, mix in a handful of mini chocolate chips or rainbow sprinkles before pressing into the pan.
- Use unsalted butter and add a pinch of salt if you prefer better control over the saltiness.
- Press the mixture gently to keep the treats soft and chewy rather than hard and dense.
- For a gluten-free version, confirm that your Fruity Pebbles cereal is gluten-free, as some brands may vary.
Storage
Store the treats in an airtight container at room temperature for up to 3 days. For longer storage, keep them in the refrigerator for up to a week. When ready to eat, let them sit at room temperature for a few minutes if refrigerated, or warm slightly in the microwave for a softer texture.
How to Serve
Serve this delicious recipe with your favorite sides.
FAQs
Can I use a different cereal instead of Fruity Pebbles?
Yes, you can substitute Fruity Pebbles with other crispy cereals like Rice Krispies or Cocoa Pebbles for a different flavor and texture.
How can I prevent the marshmallows from burning while melting?
Always melt the butter and marshmallows over low heat, stirring constantly to avoid burning. Using a medium or low setting helps maintain control over the melting process.
PrintFruity Pebbles Rice Krispie Treats Recipe

These Fruity Pebbles Rice Krispie Treats are a colorful and delightful twist on the classic no-bake dessert, combining crispy Fruity Pebbles cereal with gooey melted marshmallows and butter for a sweet, chewy, and fun treat perfect for any occasion.
- Prep Time: 10 minutes
- Cook Time: 5 minutes
- Total Time: 35 minutes
- Yield: 9 treats 1x
- Category: Dessert
- Method: Stovetop
- Cuisine: American
Ingredients
Ingredients
- 5 cups Fruity Pebble cereal
- 1/4 cup salted butter
- 4 cups mini marshmallows
Instructions
- Prepare the cereal: Pour 5 cups of Fruity Pebble cereal into a large mixing bowl and set aside. Lightly grease an 8×8-inch pan with nonstick spray or butter to prevent sticking.
- Melt the butter and marshmallows: In a medium saucepan over low heat, melt 1/4 cup salted butter. Once melted, add 4 cups of mini marshmallows and stir constantly until the marshmallows are completely melted and the mixture is smooth, approximately 3 to 5 minutes.
- Combine marshmallow mixture and cereal: Immediately pour the melted marshmallow mixture over the Fruity Pebble cereal in the mixing bowl. Use a rubber spatula to stir gently but thoroughly until all the cereal is evenly coated with the marshmallow mixture.
- Press into pan: Transfer the coated cereal mixture to the prepared 8×8-inch pan. Using a piece of wax or parchment paper, press the mixture evenly into the pan. Be careful not to press too hard to maintain the treats’ light and chewy texture.
- Cool and cut: Allow the treats to cool completely at room temperature for about 20 to 30 minutes. For faster cooling, place the pan in the refrigerator for about 5 minutes. Once cooled, cut into 9 squares and serve.
Notes
- You can substitute salted butter with unsalted butter and add a pinch of salt if preferred.
- Use wax or parchment paper when pressing the mixture to prevent sticking and ensure easy removal.
- For a fun twist, add rainbow sprinkles on top before the treats set.
- Store leftover treats in an airtight container at room temperature for up to 3 days to maintain freshness.
- To make them gluten-free, ensure the Fruity Pebbles cereal used is certified gluten-free.
Keywords: Fruity Pebble Rice Krispie Treats, no bake dessert, fruity cereal treats, easy dessert recipe, marshmallow treats