Chocolate Brownies Recipe
Introduction
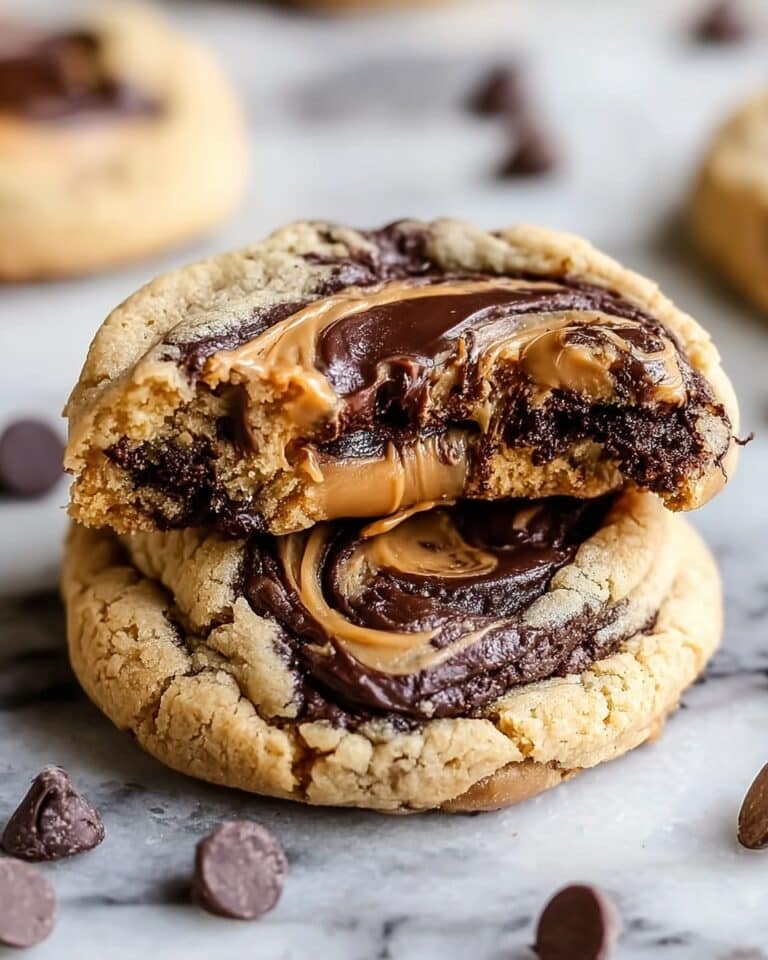
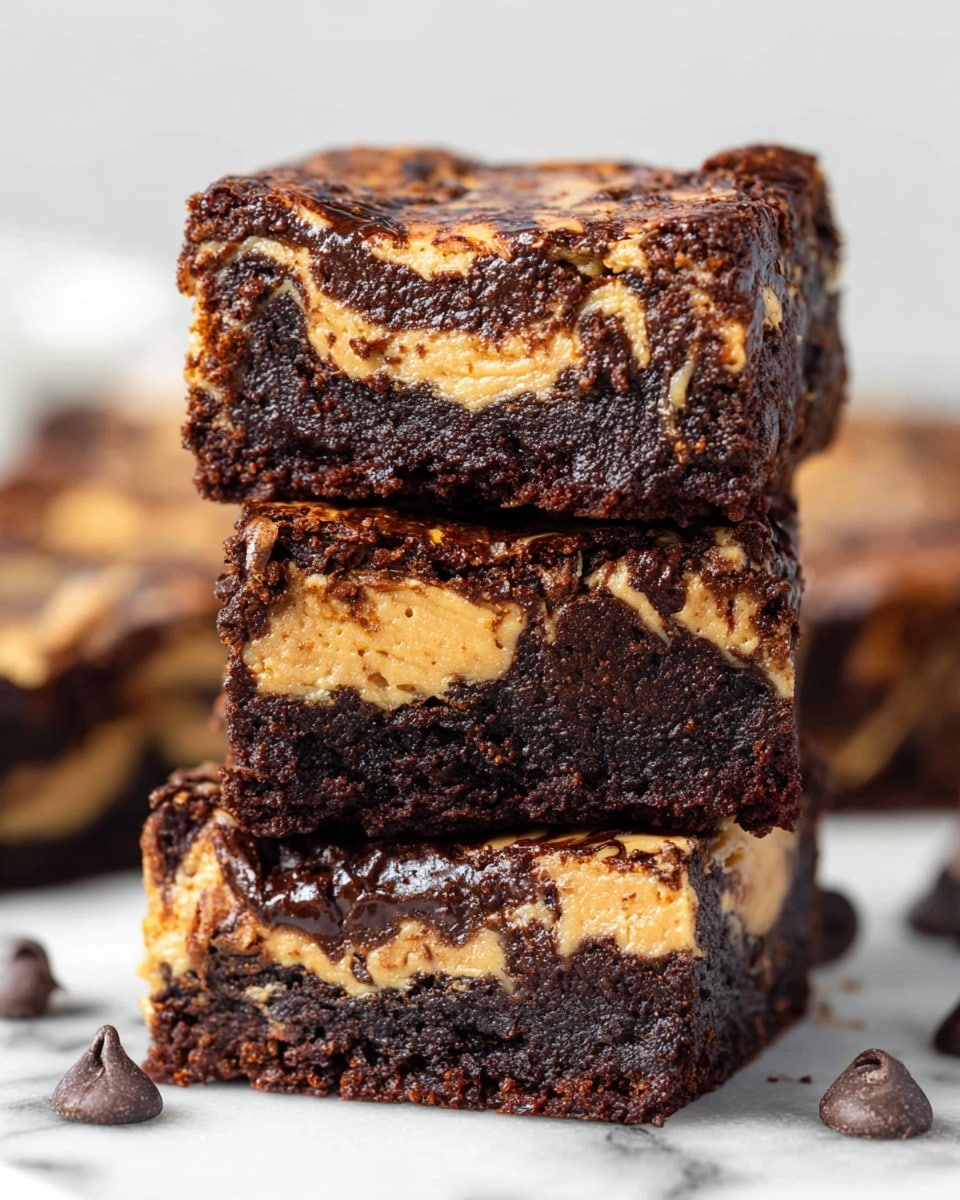
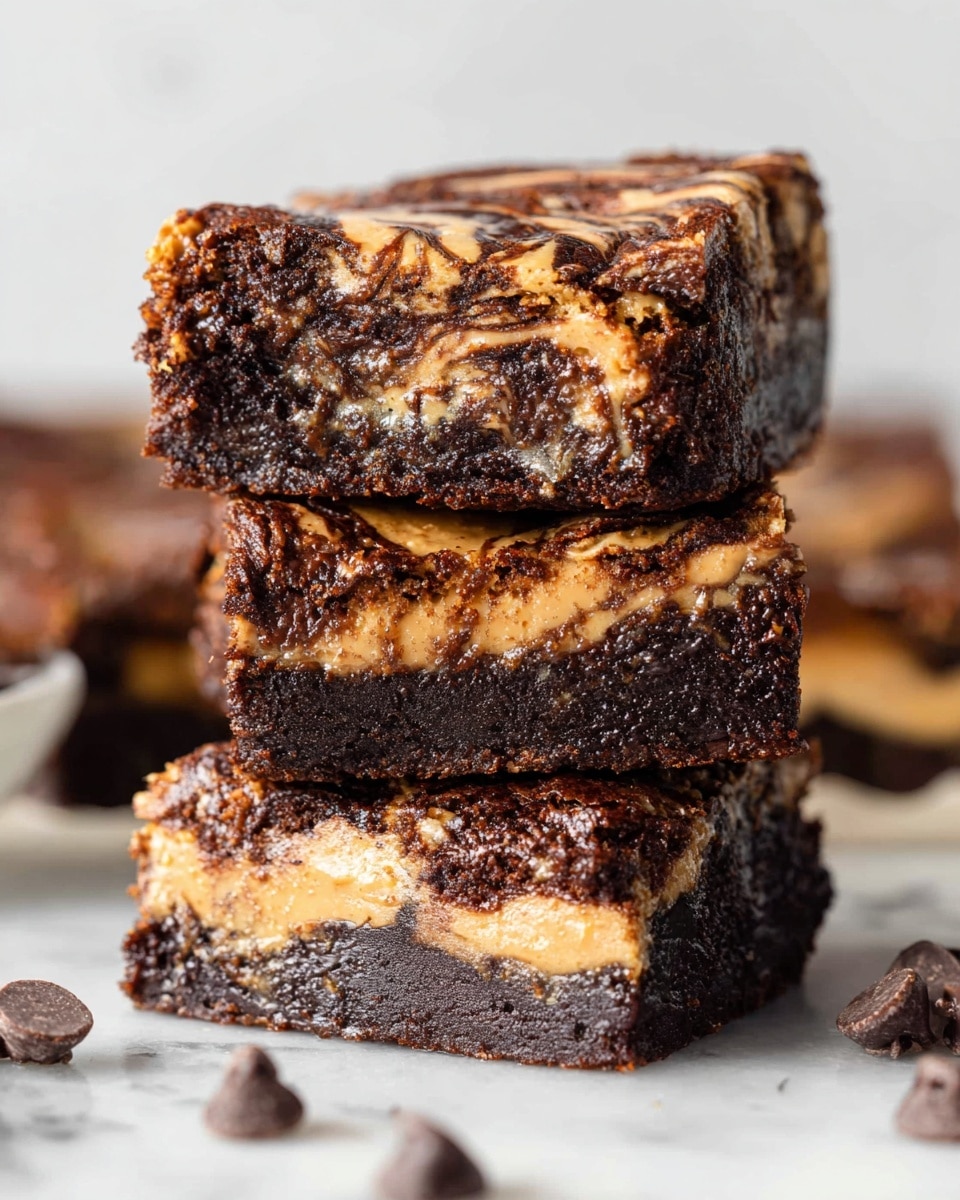
These Chocolate Butter Brownies combine rich, fudgy chocolate with creamy peanut butter swirls for a decadent treat. Easy to make and perfect for peanut butter lovers, they offer the perfect balance of sweet and nutty flavors.
Ingredients
- 1 ½ cups creamy all natural peanut butter
- ⅔ cup powdered sugar
- ½ cup melted butter
- 1 ¼ cup chocolate chips
- 1 cup granulated sugar
- 2 eggs
- 3 tbsp cocoa powder
- 1 tsp vanilla extract
- ¼ cup flour (all purpose or gluten free flour)
- ⅓ cup creamy all natural peanut butter (to swirl)
Instructions
- Step 1: Preheat the oven to 350 degrees Fahrenheit. Line an 8 inch by 8 inch square pan with parchment paper.
- Step 2: Make the peanut butter filling by combining 1 ½ cups creamy peanut butter and powdered sugar in a bowl. Stir until thick and well combined, then set aside.
- Step 3: In another bowl, mix melted butter and chocolate chips. Stir until the chocolate is fully melted and creamy. Use a quick microwave burst if needed to melt completely.
- Step 4: In a clean mixing bowl, whisk granulated sugar and eggs vigorously for 2 minutes until smooth and slightly fluffy.
- Step 5: Pour the melted chocolate mixture into the sugar and egg mixture. Stir to combine evenly.
- Step 6: Add cocoa powder, vanilla extract, and flour. Stir gently until all ingredients are incorporated and the batter is smooth.
- Step 7: Pour half of the brownie batter into the prepared pan and spread evenly.
- Step 8: Drop dollops of the peanut butter filling over the brownie batter. Use your hands to spread and flatten the peanut butter layer; it doesn’t need to be perfect.
- Step 9: Pour the remaining brownie batter on top, covering the peanut butter layer.
- Step 10: Drizzle ⅓ cup creamy peanut butter over the top of the batter. Use a knife or toothpick to swirl it through.
- Step 11: Bake for 28 to 30 minutes until the middle is set and the brownies no longer jiggle when you gently shake the pan.
- Step 12: Remove from oven and allow the brownies to cool completely before slicing and serving.
Tips & Variations
- Use natural peanut butter with no added sugar for a less sweet filling and more pronounced peanut flavor.
- For extra texture, sprinkle chopped peanuts or walnuts on top before swirling the peanut butter.
- If you prefer a gluten-free option, substitute the all-purpose flour with an equal amount of gluten-free flour blend.
- To intensify the chocolate flavor, add a pinch of espresso powder to the batter.
Storage
Store the brownies in an airtight container at room temperature for up to 3 days. For longer storage, refrigerate them for up to a week or freeze for up to 2 months. To reheat, warm individual pieces in the microwave for 10-15 seconds for a soft, gooey texture.
How to Serve
Serve this delicious recipe with your favorite sides.
FAQs
Can I use crunchy peanut butter instead of creamy?
Yes, crunchy peanut butter can be used but it will change the texture of the filling with added crunch. It’s a delicious variation if you enjoy a bit of extra texture.
How do I know when the brownies are done baking?
The brownies are ready when the middle looks set and doesn’t jiggle when you shake the pan gently. Insert a toothpick near the center; it should come out with just a few moist crumbs but no wet batter.
PrintChocolate Brownies Recipe
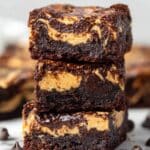
These Chocolate Butter Brownies combine the rich flavors of creamy peanut butter and smooth melted chocolate into a luscious, fudgy treat. Featuring a peanut butter swirl layered through dense chocolate brownie batter, this recipe offers an indulgent dessert perfect for any chocolate lover.
- Prep Time: 15 minutes
- Cook Time: 30 minutes
- Total Time: 45 minutes
- Yield: 16 brownies 1x
- Category: Dessert
- Method: Baking
- Cuisine: American
Ingredients
Peanut Butter Filling
- 1 ½ cups creamy all natural peanut butter
- ⅔ cup powdered sugar
Brownie Batter
- ½ cup melted butter
- 1 ¼ cup chocolate chips
- 1 cup granulated sugar
- 2 eggs
- 3 tbsp cocoa powder
- 1 tsp vanilla extract
- ¼ cup flour (all purpose or gluten free flour)
Peanut Butter Swirl
- ⅓ cup creamy all natural peanut butter (to swirl)
Instructions
- Preheat Oven and Prepare Pan: Preheat your oven to 350 degrees Fahrenheit. Line an 8 inch by 8 inch square baking pan with parchment paper to prevent sticking and for easy removal of the brownies.
- Make Peanut Butter Filling: In a bowl, combine 1 ½ cups creamy peanut butter and ⅔ cup powdered sugar. Stir well until the mixture is thick and evenly blended. Set aside.
- Melt Chocolate Mixture: In a separate bowl, add ½ cup melted butter and 1 ¼ cup chocolate chips. Stir the mixture until the chocolate is fully melted and creamy; if necessary, microwave briefly in 15-second bursts to assist melting.
- Whisk Sugar and Eggs: In a clean mixing bowl, vigorously whisk together 1 cup granulated sugar and 2 eggs for about 2 minutes until the mixture is light and slightly fluffy.
- Combine Wet Ingredients: Pour the melted chocolate and butter mixture into the sugar and eggs mixture. Stir thoroughly to combine all wet ingredients.
- Add Dry Ingredients: Add 3 tablespoons cocoa powder, 1 teaspoon vanilla extract, and ¼ cup flour (all purpose or gluten free) to the wet mixture. Stir until everything is fully incorporated to form the brownie batter.
- Layer Batter in Pan: Pour half of the brownie batter evenly into the prepared pan.
- Add Peanut Butter Layer: Drop the peanut butter filling in dollops on top of the brownie batter layer. Using your hands, gently spread it out into an even layer; it doesn’t have to be perfectly smooth.
- Add Remaining Batter: Pour the remaining brownie batter on top of the peanut butter layer, spreading it evenly.
- Apply Peanut Butter Swirl: Drop ⅓ cup creamy peanut butter evenly over the top of the batter. Use a knife or toothpick to swirl it into the batter to create a marbled effect.
- Bake the Brownies: Bake in the preheated oven for 28 to 30 minutes, or until the middle looks set and the brownies no longer jiggle when the pan is gently shaken.
- Cool and Serve: Remove the brownies from the oven and allow them to fully cool in the pan before slicing into squares and serving.
Notes
- Use parchment paper for easy removal and clean edges.
- Make sure the chocolate mixture is fully melted before combining with eggs and sugar to ensure a smooth batter.
- Check doneness by gently shaking the pan; a slight jiggle in the edges is okay but the center should be set.
- You can substitute all-purpose flour with gluten free flour for a gluten free version.
- Allow the brownies to cool completely before slicing to avoid crumbling.
Keywords: chocolate brownies, peanut butter brownies, chocolate butter brownies, fudge brownies, peanut butter swirl brownies, easy brownies recipe, chocolate dessert